

Create Pi Network Account | Full Guide for Beginners
In this guide, Create Pi Network Account – Step-by-Step Guide, you will learn how to create and register a Pi Network account step by step correctly and without errors. We recommend following this guide exactly to avoid common mistakes that could affect your account verification and security.
Download the Pi Network App
There are two Pi Network applications:
- Pi Network App – This is the main app where you will register, create your account, and start mining Pi cryptocurrency from your phone.
- Pi Browser – This app will be covered later in the Pi Network Community section.
To get started, download the Pi Network App and follow the step-by-step instructions below.
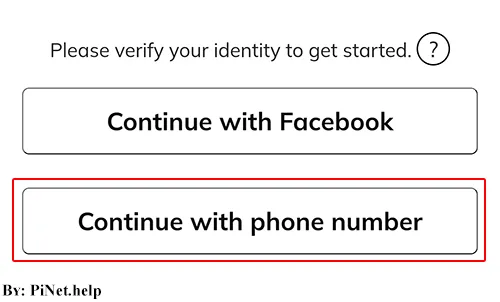
1. Open the Pi Network App
Once you open the Pi Network app for the first time, you will see different account creation options. We recommend selecting “Sign up with phone number,” as highlighted in red in the image.
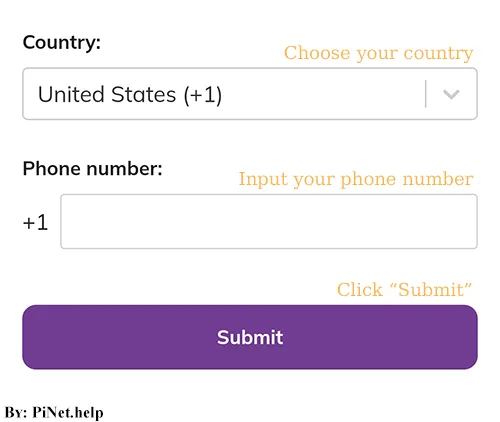
2. Create an Account Using Your Phone Number
On this page, select your country and enter your real phone number. Make sure to enter a valid and correct phone number, as you will not be able to change it later. Double-check before clicking “Submit.”
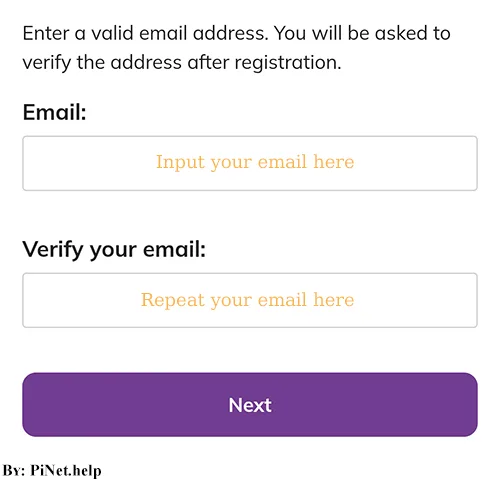
3. Link Your Email Address
In this step, enter your email address in both fields, as shown in the image. Use a real email address, preferably a Gmail account, and keep it secure to avoid losing access.
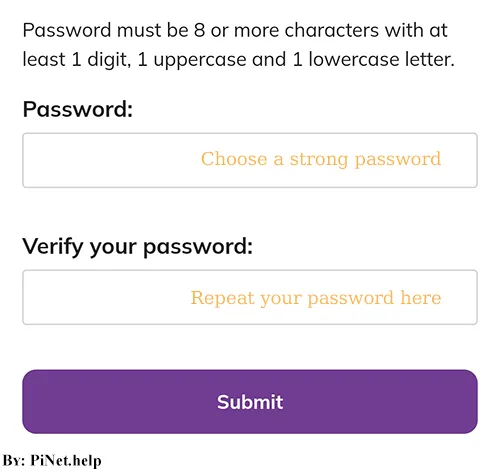
4. Create a Strong Password
Here, create a strong password of at least 8 characters. Your password should include:
- Upper and lowercase letters
- Numbers
- Special characters
Example: iCo#Pi%2025 (This is just an example; create your own unique password and keep it secure.)
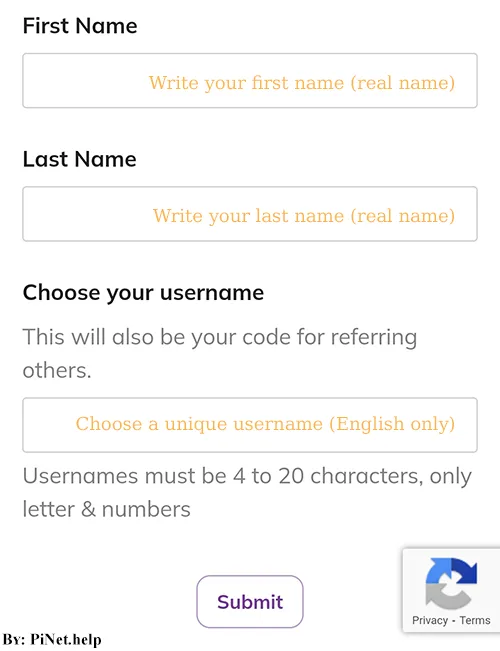
5. Enter Your Real Information
On this page, enter your real personal details to ensure smooth account verification.
- First Name: Enter your real first name exactly as it appears on your official documents.
- Last Name: Enter your last name or family name as it appears in your official documents.
- Username: Choose a unique username in English. If the username is taken, try another variation.
⚠️ Important: Your first and last name must be accurate and match your official documents. Avoid using nicknames or fake names, as this could prevent your account from being verified.
6. Enter Referral Code
On this page, enter the referral code (5ial) and click “Submit.”
By using this referral code, you will receive 1.00000 Pi coins for free as a registration gift, which could be worth more than $300 in the future. Also, you will be notified daily to mine automatically.
🚨 Note: If you do not use a referral code, you might experience delays in KYC verification and Mainnet migration. This is your choice, but we want to highlight the possible impact.

7. Start Mining Pi Network Cryptocurrency
The final step! Your Pi Network account has been successfully created. Now, tap the “Start Mining” button to begin your first Pi mining session on your phone.
⚠️ Warning: Some ads may appear in the app. These ads are served by Google and do not represent the official Pi Network. Avoid interacting with suspicious ads that ask for your private keys in exchange for free Pi coins.

Conclusion
That’s it! Now you have successfully registered on Pi Network. You can mine Pi coins daily for free from your phone. Just open the app once a day and tap the mining button. Each mining session lasts 24 hours, meaning you must log in once every 24 hours to start a new session.
🔹 Good to know: Mining is cloud-based, meaning it does not consume your phone’s battery, mobile data, or storage. So, you don’t need to worry about resource usage.
We also recommend checking out the Pi Network Checklist guide here: [Pi Network Checklist]


1 thought on “Create Pi Network Account – Step-by-Step Guide”
Richard eliudi